Showing posts with label cake pops. Show all posts

April 25, 2012

Birthday cake pops!

Remember the little girl's birthday cookies I did? (as in the previous post) Well her mom (who also loves to bake) wanted to cake pops instead of cake for her daughter's birthday this year. Since we liked to hang out and bake together, she asked me to join her in  making cake pops for the party.

We did chocolate cake with pick and purple for the outside. I learned a lesson with these. For the purple, we started with pink candy melts and tried coloring from there. I figured the fact that we had purple, red, and blue food coloring we could come up with a good color. Honestly, we never really loved the purple we came up with. In the future, I will either start with purple or white candy melts and color from there.

Remember the adorable tags this mom did for the cookies? Well, she made an adorable stand for the cake pops also. I'm learning from her to think outside the box on the display aspect. (I can do the baking...my brain has to be trained to think crafty presentation!)


February 21, 2012

these are to die for...

oh my goodness, I made some mint Oreo balls and they were AMAZING. After a friend made some Oreo balls that were fabulous, I had to ask her how she did it/what she used. Just a couple days later, I came across a post on pinterest where someone had made Oreo balls, but used mint oreos.

I tried it last night (well...I wrote this like a month ago and am just now posting, so not really last night).  A couple friends of mine from college were coming over for dinner and to hang out for the evening and it seemed like the perfect opportunity. They were an absolute hit. And by hit, I mean we all loved them. Really, this picture doesn't do them justice.

Here's the recipe..try it yourself.

1 package of oreos (mint or regular)
6 oz. cream cheese
melted chocolate chips (to dip them in, any kind work. I used some white chips that I could dye and then a combo of milk chocolate and semi sweet for the rest)

  • Finely chop the oreos (i broke them up first and then used a blender). Dump in a bowl. dump the cream cheese (softened) in the bowl. Mix them up. form into 1 in. balls, place on cookie sheet and stick in the fridge for 20 min. or so.
  • Melt the chocolate. pull the Oreo balls out of the fridge and dip them in the chocolate, then place on wax paper.
  • To dip, I used stuck Popsicle sticks in them and dipped them like I do my cake pops, then I just pulled the stick out and spooned a bit of chocolate over the hole to cover it up.
  • Let set and harden, then consume
  • Try not to eat all in one sitting.
*One package of mint oreos made the 21 oreo balls you see on the platter.

November 23, 2011

A wedding!

A Couple weekends ago, my MIL got remarried :) She married a great man in a sweet and simple ceremony that fit them perfectly. There were less than 30 guests and many were around the entire weekend for a weekend of fun, laughter, and good food.

My MIL has seen the pictures of cake pops I had previously made and had asked me to make some for the wedding in lieu of the traditional wedding cake. I was thrilled to make them. She gave me no specific colors, just that she wanted bright colors. I took to the candy color options I had and spent time just figuring out how many different colors I could come up with (in the effort of full disclosure, this *may* have been more about me playing around and having fun than about the cake pops themselves). After being torn between 2 color combinations (and I'm still only 90% convinced I chose the right one), I decided upon blue, purple, and pink.

I was asked to make them with white cake, which was fun since I hadn't done it before. At the last minute, I realized I would need an additional cake so I decided to bake a red velvet cake as well. I'm not sure if I will make red velvet again since myself or my husband didn't like it nearly as well as the other flavors I have made. If I do make it again,  I will need my husband around to take pics because it was quite the colorful and messy experience! The white cake tasted really good.


Here are the pics of the final products...

October 17, 2011

More baking!

Well. I found out I passed one of my exams! I won't know about the other one for a while, but at least it's done with!

In early September, I made my birthday cake! It certainly won't win any awards and the writing is quite crooked, BUT, it was my first layered cake (just 2 layers), it didn't fall over, and it sure tasted good-so I was pleased.


A little while later, a friend and I made some more cake pops. They turned out pretty well, though I learned the lesson that even though making them bigger might SEEM like a great idea, it really isn't-unless I want them all to fall off their sticks, that is :) oh well, ya live and learn.

July 24, 2011

Cake Pops!


I've been contemplating starting a blog for a while, one full of random thoughts and fun adventures, or more likely, the less exciting bits of life ;) However, I've never been able to come up with a good starting point (and to be frank, I fear I will start gung-ho and then promptly forget about it and let it die, which, if I'm honest, is still within the realm of possibility).
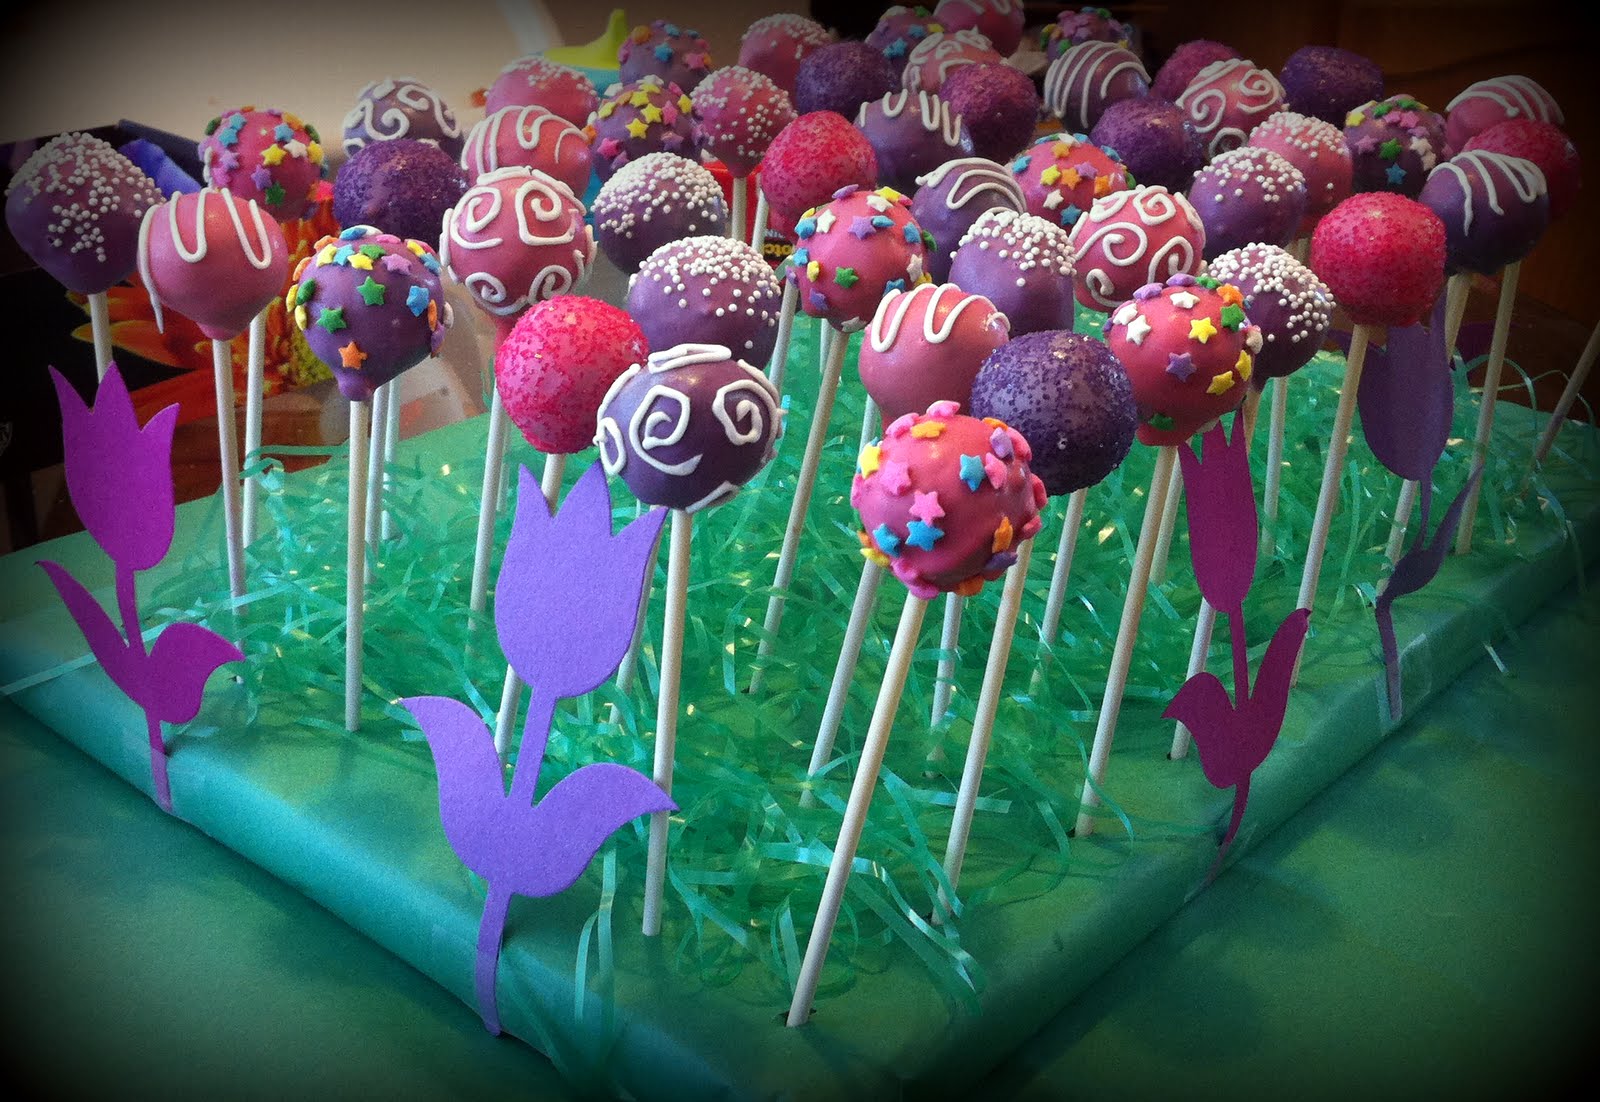
My recent venture into the world of cake pops seemed like a good and fun place to start! After all, what isn't fun about bits of cake and candy that you can eat off a stick? and there are sprinkles!

I had seen these a while back and considered making them. However, last Thursday, I came across someone online who had made them and was inspired to give it a go! My first thought, was that I should wait until I have a "reason" to make them-a party, or at least a family gathering of some sort. After all, my husband and I didn't really need 30-40 of these lying around. Friday came though, and I was getting antsy. I figured since I was already going to Michael's to get some picture frames (for those who know my house....they are frames to use on those 3 blank white shelves in the living room!), I may as well pick up the various things I needed from Michael's to make the cake pops-for you know, whenever the situation arose that I had a reason to make them. So, I picked up the Styrofoam, candy melts, popsicle sticks, some decorating bags and decorating tips. I already had the cake mix and frosting. There was a lot you have to gather just to start the process.

Then, I woke up Saturday and knew I couldn't wait. I had to seize the day and make my cake pops-who cares if some go uneaten cause it's just me and P? These simply were not going to wait! I read about 3 different recipes online and compiled in my mind what seemed like the best tips of each and went to work. I could tell you my exact process, but at the moment, I don't have the patience to write it out. If you are interested, I can certainly tell you what I did. If you live in the area, feel free to join me in making some and learn that way, since I most certainly will be making more. All in all, it was a fairly simple, though time-consuming process. I actually didn't finish decorating them all until today.


If you happen to want to try them, here are a few tips I have to share that I didn't see elsewhere
1) If you want purple, just buy either the purple candy dye (you have to used oil based food coloring, normal liquid won't work) or buy the purple candy melts to start with. Don't try mixing red and blue. I ended up with a decent color, but it certainly wasn't what I was going for.
2) Use a mug to dip the pops into the candy coating, not a bowl
3) Don't put them to set next to a window that is likely to have sun streaming in on them in a half hour, nothing terrible happened, they just got a little soft and mushy-thankfully I saved them before any real damage was done!

The decorating is a bit funky, but i figure between having never decorated with an icing bag and tip before and my wonderfully UNsteady hands, they turned out much better than they could have.

Of course, this also meant that when I was done decorating, I had extra melted candy in my bag and nothing to do with it! SO of course, I played!
As you can see, I grabbed a cookie sheet and just started practicing, playing around and making the mess I had already made even bigger!

And thus, the end of the cake pops project!